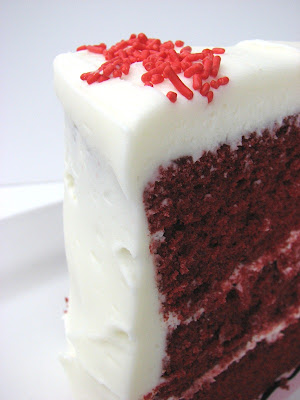
This recipe comes from the January/February 2012 issue of Food Network magazine. I've made many of red velvet cake recipes but wanted to try a new one. This one was delicious. I like the fact that it has butter and also oil in the recipe. I like the moistness that oil brings to a cake but I love the taste that butter adds. I pretty much followed the recipe but I made a double recipe and divided the batter among 3 deep 9-inch pans. The layers were pretty thick. I leveled them after baking and cooling and they were still a pretty good thickness. The recipe calls for apple cider vinegar but I used regular white vinegar. Besides that, I followed the recipe. Notice that the recipe calls for sifting the cake flour BEFORE measuring. This is an important step because if you measure before sifting, you will end up with quite a bit more flour then the recipe needs and your cake will end up dry. I guess if you absolutely do not want to measure after sifting, then use less flour than 3 cups. You don't want a dry cake. Also, make sure you remove the cake from the oven while you still have moist crumbs attached to your tester toothpick. The residual heat will continue to bake your cake and again, you don't want to end up with a dry cake. This cake also had an icing recipe along with it but I chose to use my own cream cheese icing recipe. Another good icing recipe to use with red velvet cake is the old fashion boiled kind of icing. If you have never tried the old fashion boiled icing, you need to make it at least once. It is very silky smooth, non gritty, not sweet and just plain delicious. Here is a link below for the recipe.
But anyway, either the cream cheese icing or the boiled icing will work for this wonderful red velvet recipe. It's an absolutely delicious recipe and would be delightful for Valentines Day as either a layer cake or cupcakes.
I had a difficult time photographing this cake. First of all, the natural lighting in my house is horrible but outside is a very gray and extremely rainy day. So I had to mess with the brightness function on my photos while downloading them and the result was just not good. I need to get some good tips from others about good lighting because what do you do when natural lighting is just not available? In Seattle, we don't get a lot of bright days. I need some other options.
Red Velvet Layer Cake
Food Network
12 tablespoons (1 1/2 sticks) unsalted butter, softened, plus more for the pans
3 cups cake flour (sift before measuring)
3 tablespoons unsweetened Dutch-process cocoa powder
1 teaspoon baking soda
1/2 teaspoon salt
1 3/4 cups granulated sugar
1/3 cup vegetable oil
3 large eggs, at room temperature
1 tablespoon red food coloring
2 teaspoons apple cider vinegar
1 teaspoon vanilla extract
1 cup buttermilk
Make the cake: Preheat the oven to 350 degrees F. Butter two 9-inch-round cake pans and line the bottoms with parchment paper; butter the parchment. Whisk the flour, cocoa powder, baking soda and salt in a bowl.
Beat the granulated sugar, 12 tablespoons butter and the vegetable oil in a stand mixer fitted with the paddle attachment on medium-high speed until fluffy, about 4 minutes. Beat in the eggs one at a time. Beat in the food coloring, vinegar and vanilla. Reduce the mixer speed to low; add the flour mixture in 3 batches, alternating with the buttermilk, beginning and ending with the flour, until just combined.
Divide the batter between the prepared pans. Bake until a toothpick inserted into the center comes out clean, 35 to 40 minutes. Let cool 10 minutes on racks, then turn the cakes out onto the racks to cool completely.


1 comment:
this recipe is similar to my mom's. she was always the baker and i guess i got her baking genes. and yes the white vinegar is best along with oil. she also did 3 pans but cut them in half to make a 6 layer with cream cheese icing. it presented beautifully. she would also add chopped pecans to the icing for the outside layer...delish
Post a Comment